Sunday, January 30, 2011

Building Kayaks for Three Little Pirates

Please read this post as if I actually posted it when it happened, July of 2009. Yes, I am a bit of a procrastinator, we all know it. I will be attempting to get up to date on all the major events(as I see them) since May 2009. Be patient , they might be out of order or not even accurate, but who said true stories have to be factual!


Cheri and I are going to have visitors for the Summer,(well part of the Summer) three very active and adventurous little boys. One of the responsibilities we feel we have to fulfil as grandparents, is to get these three littluns doing things they would not normally do. Take them out of their usual rhythm so to speak. We have taken them hiking, camping, fishing, rock-climbing, berry picking, sledding and snow-boarding, all sorts of stuff, so that when they get older they will have great memories to look back on.

One of the things we have planned for them this Summer is kayaking. So with that in mind, our front porch became "Paul-Paul's Boatyard". Well if you were going to make three plywood kayaks wouldn't you do it on the front porch so that all the neighbours could see you when they drove by.

I know you, dear reader, are going to be wondering how on earth a welder with minimal woodworking skills is going to manage to make three kayaks that will be good enough to risk putting boys in and sending them off to the far reaches of the seas. I plan on using a method that all the experts say,"any idiot can master". The method is called "Stitch and Glue" and works exactly as it sounds, you sew some pieces of wood together in the shape of a boat, then add fibreglass tape and glue and resins to make it waterproof. Simple no? Actually, yes!

I did not go to the trouble of purchasing plans/blueprints etc because, as many of you know, I am a cheap bugger. Anyway, who doesn't know what a kayak looks like? The other reason for not buying plans was that I had my own ideas of what these particular kayaks had to be, quick to build,simple to paddle, and most importantly, stable. Did I also mention cheap?

The material cost for three eight foot long kiddie kayaks was about $89. :

5 Pieces of 1/4 inch cheap plywood @ $10 each.
2 Rolls of fibreglass drywall tape @ $5 each.
1 Can of "El Cheapo" outdoor white paint @ $14
1 Epoxy resin sealing kit @ $15

Anything other than the above listed materials that was used, you may consider to have been scavenged from places I work, or they were laying about the house and I appropriated them for my own ends.

Unfortunately I did not take any pictures of the earliest part of kayak production( all the drawing, and sawing, and piecing together), so you will have to take my word for it that everything went well. It really is easier to make three kayaks than one, every time you make a piece just make three of them!

Two of my nautical works of art. Lovely lines don't you think?

Taping and glue-ing. The dark smears you can see are the result of the resin drying on the wood.
Paul-Paul's Boatworks.
So not really a canoe, not really a kayak. A Canyak maybe, or a Kaynoe? You decide.

By the time I reached the, "wow these really look like boats " stage, the three amigos had arrived for their summer at Nana's . After I had done a little more sanding and prep work, we were ready to paint our boats. The unspoken rule was, "If you want to paddle it, you've got to paint it", so the boys took turns at painting kayaks. Each little guy picked out his own boat and set to painting it with a helping hand from Paul-Paul. I do not know what sort of thinking process went into choosing each boat, cos , as far as I could tell, they were all identical.
Here's Christian Giovanni Hall putting a coat of barnacle resistant paint on his boat.

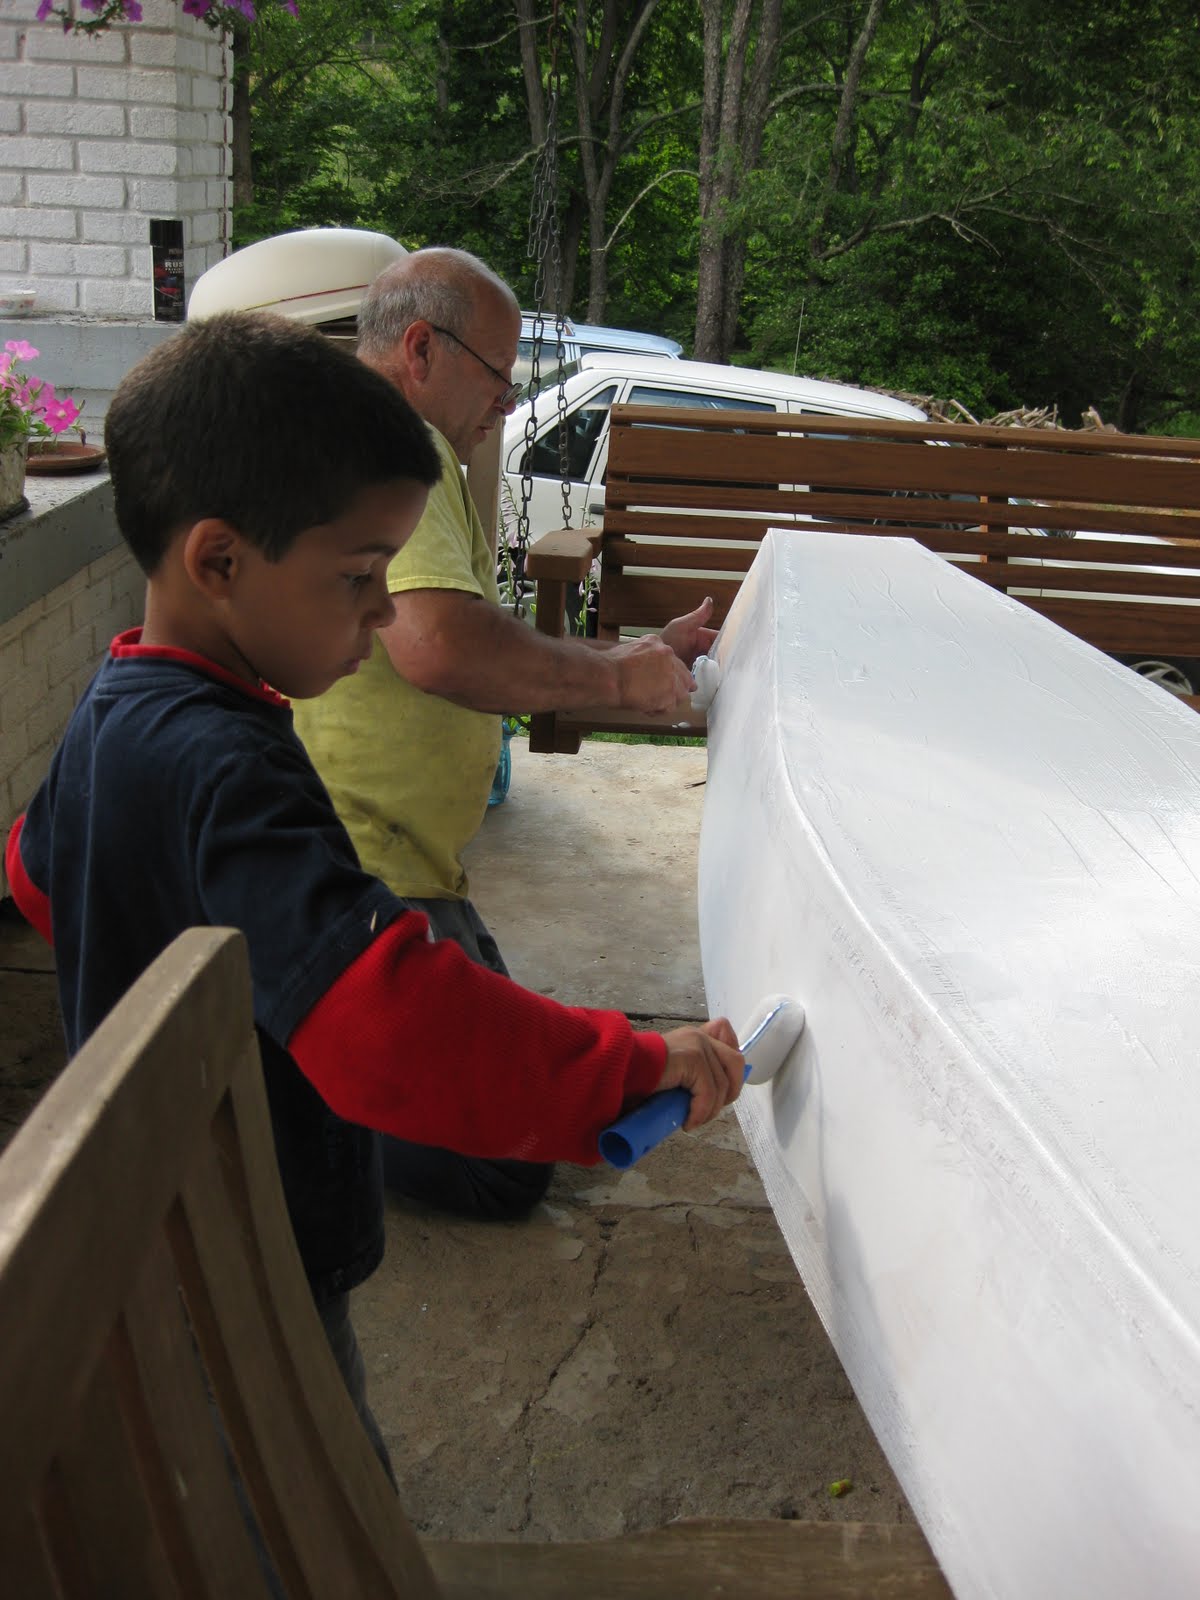
Sometimes it is hard to tell if he really is into this, or if he would rather be inside watching cartoons.
That section of the hull is definitely gonna be barnacle free!

I think he is really concentrating here, don't you?

Here are a few pics of our next pirate, Cade, ARRRRRRR! Cade needs absolutely no convincing to join in and build something, he even stepped up and helped me in the sanding process. He really seems to enjoy doing stuff with his hands and seeing an end product.

Judicious application of paint by Cade. Paul-Paul just slops it on. The thicker the better!

The Roger Federer two-handed method.

Almost missed a spot.

Having fun painting the "pointy end".

A beautiful afternoon to paint a boat.

Now for our third and most fierce pirate.....The Dread Pirate Austin. Austin, as you will see, is much more thoughtful about how to apply paint. No matter how much I urge him to slop it all over the place, he carefully spreads it out in just the right amounts in just the right places.

"Paul-Paul, you're not doing it right".
Now there is a young man concentrating on what he is doing. Ten out of ten for good work.
"Paul-Paul, you are painting my side of the boat, move over.....".

I think he is singing "Row row row your boat, gently down the stream......", you know the rest.

The last two pictures here, show the finishing touches being added to all three boats. Speed stripes are being added for effect, and to break up the mass of white paint that is the sides of these vessels. Notice how we went from "boat shaped bits of wood, glued together, to boats, and now VESSELS". Aren't we a bit full of ourselves?
Well yes, I am a bit proud actually. I built three boats in about twenty hours, using simple tools, and spending less than one hundred dollars!

Pin striping, with impatient boys looking on.
No, I am not concentrating, I have to lean forward like that so I can see what I am doing.
I just noticed, three identical boats on three identical chairs, what a laugh. The boys did want their boats to be a little different from each other, so I grudgingly let them pick through my trash/treasure boxes for stuff to decorate them with.
Cade picked a Lincoln Continental emblem for the prow of his boat, and a dinosaur of some kind for right in front of the seating area/cockpit.
Christian chose a stegosaurus for the cockpit area, and an old Saint Christopher medal that was once on the dashboard of an old sports car, for the pointy end of his boat.
Austin managed to snag a toy Space Shuttle before the other boys saw it. That will go on the front of his boat.He chose a golden frog ornament for the cockpit area of his boat.
As we were going to be launching on July the 4th, I made sure that the stern deck of each boat had an American flag glued in place.
Stay tuned for the next thrilling instalment; Will the boys,
Be able to paddle,
Be swept over the giant waterfall,
Drown as their flimsy craft break into pieces,
Or eat too many hot dogs and Nana won't let them in the water.


All the best,...Paul-Paul.

Sunday, May 17, 2009

Gold Fever

A different kind of blog entry today! As the subject is treasure hunting and shipwrecks I guess you could say it's a "Captain's Blog". Have you ever noticed that your list of favourite books is almost completely comprised of books that you have read at least twice? Well the same is true for me and in the genre of true adventure books, this one ranks right up there with Into Thin Air by Jon Krakauer. The book I am speaking of is....Ship of Gold(in the Deep Blue Sea) by Gary Kinder and it tells the story of the sinking of a ship, theSS Central America, in 1857. Approximately450 lives were lost when the ship sank in an Atlantic storm, 149 people were saved(mostly women and children) but from the point of view of most modern day treasure hunters the bigger story was the loss of 21 tons, lets say that again TWENTY ONE TONS of GOLDMove forward to 1980's America and a young adventurer named Tommy Thompson enters the scene with a novel idea or even a whole new philosophy on how to find profitable shipwrecks in the Atlantic Ocean. This engrossing book tells the story of the SS Central America Treasure from two time-frames so that , as the reader, you have the vicarious thrill of finding the gold and artifacts not once but twice. The hard work and strife of the original miners and grub-stakers is juxtaposed with the modern day struggles of a band of ingenious treasure hunters and although some of the text is technical it never gets so far into techno-babble that the reader loses interest.
For anyone who loves a great adventure story or who owns a metal detector or just loves to "dig for stuff", this is one of the best reads you will ever find.
The picture above is part of the wreck just covered in gold coins and bars. Oh by the way 21 tons of gold at 1000 dollars an ounce is 672 MILLION dollars, but that is just the value of the gold in the coins. As collector coins they are worth anywhere up to 50 times the amount of gold in them!!!

Now then, what else has the Garden Geezer been up to besides re-reading old books? Well I am still working on the side of the house that needs trees cleared off so that we can put in a workshop on the property, its untelling (real word.ask the locals) how tired you can get climbing up and down trees and piling up firewood for next winter. Still have not got the garden going yet, other than some lettuce for Cheri, because the weather is not really co-operating with my desire to get my fingers in the dirt. Maybe, as everyone around here says, I'll just have to wait for Memorial Day to pass before I do any real planting. My seed taters are ready to go in the ground so those will probably be the first pictures you see of the garden. I also have about a dozen Strawberry plants started in the house and they will go out as soon as the ground warms up.
Cheri and I put wallpaper on the ceiling in the Library/Living room today, now THAT was an adventure. I'm sure we looked like Laurel and Hardy what with the paper sticking to us and having to climb around each other on a very narrow scaffold. We had to put up 8 pieces that were 14foot 6 inches long AND make the patterns line up AND work as a team...aarrgghh. By the time we were on our 3rd piece we had a system worked out and we could actually grin as we worked instead of growling. Oh and did I mention that when wallpapering a ceiling you have to use a special kind of plaster that has clay in it! So not only are you working overhead with a 14 foot long piece of paper but it is weighted down with clay paste! What a pain. The end result after 3 or 4 hours of hard slog is quite nice, really.
Now all I have to do to make the room "complete" is , add cornices, replace the furniture, touch up/clean the walls, sand and paint the kickboards and make bookshelves. Cool, wonder what I'm gonna do after lunch!
We also taught dance, 3 classes, yesterday at the Crossnore Academy and after the 1-o-clock class finished we had the massive pleasure of going out for lunch with some of our students and 2 of their counsellors. We drove down to Boone and all 11 of us ate at the Mellow Mushroom pizza place. Brilliant food, good company and a happy time was had by one and all.
More to come later.
Garden Geezer

Tuesday, May 5, 2009

A special blog entry for Faith and Walter

Hello Faith, Hello Walter. I felt as if I had to do a special entry just for you two. I know Walter is quite concerned with my tree chopping activities , so I decided to show you both some of the area where Cheri and I live in order to put your mind at ease about the massive number of trees around here.
As you can see from this first picture we are not short of the tall brown and green stuff. In certain places you can turn360 degrees and see nothing but trees. Admittedly most of the trees around us are not "old growth" the area has been harvested and replanted a coupla times probably since America was first colonised. And there certainly arent many(if any) Elms here since the Dutch Elm Disease hit some time ago. The sight of all these trees is beautiful though and they do support a lively ecosystem even if some of them are sacrificed once in a while to keep people warm in winter.


This second picture is of my lovely wife Cheri, who, like me, really enjoys the great outdoors. We actually met on a camping and canoe trip in the Okeefenokee Swamp which is on the border of Florida and Georgia.
We have hiked and canoed many miles together and I am sure there will be more stories on here in the future about some of those adventures so that you can gasp in awe, shiver in fear and laugh out loud at some of the silly predicaments we get ourselves into.

Once again walter a massive abundance of trees.


Another picture below, this time of the happy couple doing what we do best. Hanging out together and having a great time.This shot and the one above are taken from high on
Grandfather Mountain in North Carolina. On a good day they say you can see Virginia, South Carolina and Tennessee as well as....North Carolina.
Grandfather Mtn is also home to the Mile High Swinging Bridge which is really over 5280 feet high and when the wind is blowing, which it often does, really swings. It swings enough to scare people into not crossing it even though that was their main reason for going to the top of the mountain. There is also a wildlife preserve/zoo on the mountain where you can see bears,eagles,otter,deer and mountain lions or as they are called hereabouts mountain cats or cougars.
Well thats enough for now I suppose except to tell anyone reading this that Walter and Faith are friends of mine in England, both are retired although they do work hard at their favourite hobby which is Managing and Maintaining a nature reserve called Paxton Pits. Faith says she is going to start a Blog and I'm sure Paxton will be a large part of it. So if she does(hint hint Faith) make sure you have a look at it. Or you can click here http://paxtonpits.blogspot.com/ to have a look at some eccentric English folk looking after their little corner of the island.

All my best to Walter and Faith,
and any other wandering bloggers
Paul.

Monday, April 20, 2009

Pining for attention


More tree work. Above, cut a wedge. Left cut the back of the wedge. Watch and listen carefully, prepare to run.


Above. Cut more of the back out.
Left. "I wonder why this tree won't fall?"


Left. Chain saw is stuck in back cut of the tree."Now what am I gonna do?
Left. "i'll use my massive woodsplitter axe to lever the tree a bit so I can get the saw out"
Then saw some more of the back cut and TIIIIIIMBERRRRRRR.
Is that a smile on my face? Ohhh yeah!


Now I just have to make the big bits into smaller bits then let them season for 2 years before I can burn them.
A man and his green and purple chainsaw...it's a beautiful thing.


More Woodwork

The title of this post might be a little bit misleading. I am sure you expected to see pictures of me making fancy cabinetry or carving life size bears from big logs! Nope not going to happen. What is going to happen and did in fact happen, is that Paul of the weary back is going to reduce this large pile of logs to a managable and tidy pile of split wood with a simple swing of a heavy axe. Well several hundred swings, plus this isn't all the wood pile either. The more I split the more wood kept coming my way, either from generous neighbours who wanted fallen trees off their land,(if I wanted to move them) or from my own back yard where trees were in the way of building my future workshop! The above pile became this rather tidy woodcrib,(see below) made by yours truly with pallets scavenged from behind the local hardware store. Each half of that crib holds about 1 cord of firewood for next winter, the stuff on the left will be used 1st as it is the oldest and most seasoned wood. The stuff on the right might be good for winter 2009 or I might let it sit 'til 2010 to be sure it is well dried out. In case you are wondering why there is no roof on my woodshed, my extremely clever wife advised me to fill the crib with wood first and then add a roof so I don't ruin my back bending and twisting to load the wood to the top. Now thats what I call thinking, thanks honey.Oh a CORD of wood is 4 feet high x 4 feet deep x 8 feet long, and thats a lot more wood than it sounds like.

As I mentioned before some of our firewood will come from our own trees. Unfortunately I have to cut down a really nice Maple tree that is in my way. (See below) They say that timing is everything and I unknowingly decided to chop into this tree at just the right time. Apparently the first warm day after lots of cold nights is a good time to tap a Maple tree and collect the sap to make ...wait for it........MAPLE SYRUP. So I was cutting off a largish lower limb of this tree and all of a sudden it started spewing sap all over me so I quick ran into the house and found a 5 gallon bucket to hang under the Niagara like flow. While the sap was filling the bucket I looked on the internet to find out how to collect and refine maple sap. I learned that true professionals do not chop off a tree limb and let the tree bleed to death in a bucket, they actually have a little tapping tool that you push into a hole that you drill into the tree. I did know some of this stuff in a general sort of way from reading books and seeing documentaries. Our local hardware store that has been around for 100yrs and looks like anything you could ever want is on its shelves somwhere did not have maple tree taps, but they did manage to give me advice on how to make some. I adapted their advice to my needs and available materials and made 4 quite servicable taps. A tree the size of ours should only have one tap in it or else there is a good chance you will kill the tree. My tree was coming down anyway so I went a little bit beyond 1 tap. I had made 4 taps and so I added all four to the cut off limb that was already there. 5 taps in all. Again not being a professional tree-tapper I only managed to collect 4 gallons of sap, a lot more I think dripped down the tree trunk and fed the ants and other sugar loving insects in the neighbourhood.

Maple syrup is made by boiling down the sap until it is about 1/40th of the original volume (no wonder pure maple syrup is sooo expensive). 1 Gallon is128 fluid ounces, divide that by 40 and you get 3 ounces of syrup. Let me say that again 1 GALLON gives you 3 OUNCES of syrup, its more expensive than gasoline!

I boiled down my first gallon on the stove in a saucepan, it only took 2 hours, and the resulting syrup tasted awesome.I have never tasted such a strong maple flavour in my life. According to Cheri's friend Beth, who has made maple syrup before, it was a good batch.(If you can call 2-3 oz a batch) She did say however that she thought I had reduced it a little bit too far and sure enough she was right because 2 days later it started to crystalise. It still tasted good but it was a wee bit crunchy!!!!

That is why I experimented with only 1 gallon 1st. (Thats MY story anyway) So my next 3 gallons will be done in a bigger pot on a hotter fire and hopefully it won't take me all day to make 10 oz of liquid gold. Also I will stop reducing just a little sooner so that the syrup stays as syrup
As a side note, my neighbour Mike has 7 Maple trees in a row and they are starting to crowd each other, soooo he and I will be dropping 3 of them(I get a bunch more firewood for helping him) and next March or April he says I can tap his trees to my hearts content, plus Cheri and I still have 3 very large Maple trees


Absolutely Floored

Here, as best as I can show you, is the dark and dingy floor of MY library as Cheri and I found it in 2006. If you enlarge the pic you can actually see where the people used to polish and wax AROUND an oval rug. Now being a bit of a lazy bugger myself I will not criticise anyone for not moving the furniture and rug out of the room to polish the floor properly because I cannot truthfully say that I would not do the same thing!!

The above is a picture of the wooden flooring in the house as it looked after I sanded away about 80 years of wood floor wax and oil based polishes and grime from the oil fired furnace. Who knew that there was gorgeous wood underneath? It seems that the first two rooms in the house, the posh rooms or, entertaining guest rooms, were floored with really nice Oak planks/strips about two and a quarter inches wide, and the back rooms or living quarters were floored with cheaper pine wood. The dining room and bedroom must have had grade 1 pine and the kitchen and hallway had grade 2 or 3. I am sure you will be seeing pictures of pine floors on here sooner or later.

Below are 2 pictures of the same floor after fine-sanding with 220 grit and coating with a clear urethane finish then waiting 5 days and repeating the process. After kneeling on this floor only a foot away from the details whilst sanding and coating it is a real surprise to stand up, walk away for a cup of tea then come back to see the big picture with a fresh eye. It just made me smile(well grin really) and say "WOW".


The next three pictures show the floor 1 week later after a third sanding, very light, and another coat of clear urethane. I can't help but say that I am very impressed with myself but I know that a real carpenter/floor guy would have probably done a 10 times better job


Well there you go. Only four more rooms and a massive hallway to go. Good thing we have a 10yr plan. Oh by the way did I mention there were holes in the floor that needed to be fixed before i could even start sanding and coating. All part of the adventure I guess.


Monday, March 9, 2009

Is it spring?

NO not quite yet, however we have had 3 or 4 days of exceptionally fine weather. Exceptionally being the operative word of course. It has been so nice in fact that I have been tempted to scrap my idea of making cold frames to start my veggie seeds growing in, and just sow the little buggers straight into the garden. I have been forewarned by concerned neighbours who tell me horror stories of how they planted early a couple of times when Mother Nature tricked them into believing Winter was really over. Their dire warnings are rife with stories of stunted tomato bushes, deformed mushy beans, still-born strawberry plants and corn so weak it couldn't hold it's own head up.....ohh the humanity. So, I think I shall continue on with the cold-frame plan and keep my little offspring sproutlings warm and comfy under glass until Mother's Day, which is the usual time of year around here to put things unprotected in the ground. Oh for any non-gardening types that means we should have had our last FROST in the middle of May.
In case some of my 3 followers out there(isn't it great to be popular) don't know I spent a LOT of time last September and October collecting apples from generous friends, neighbours and complete strangers. These red, green and golden fruits (the apples not the neighbours) gave me countless hours of fun making such things as apple sauce, apple butter, apple pear chutney apple juice....and har har har HARD APPLE CIDER. I made four or five seperate batches and bottled them in 1 gallon glass containers. Some of the batches I brewed were to be sweet some dry and some medium. They were all supposed to turn out perfect buuut with this being my first attempt at home brewing some of them had to be poured down the sink after the first tasting, bleuuuhhh yeuuch. Enough of them came out right that I could actually give them as presents to people or even have guests drink them when they came for dinner. Cheri of course sticks to that California grapevine rubbish that people like Mondavi et al have been putting out for the unwashed masses for nigh on a hundred years, HA what do they know about wine making. Anyhow , earlier today I was at the local hardware store giving some of my Sweet Cider to one of my neighbours and he introduced me to another local feller named Charlie. It turns out that Charlie was in the store buying buckets to catch the sap from his Maple trees. He's tapping his trees to make Maple Syrup!!! Guess where I am going to be tomorrow night about 6 o-clock, thats right , learning about maple syrup. We happen to have 4 Maples in our yard and I remember seeing them seeping last year , hmmmmm.