The title of this post might be a little bit misleading. I am sure you expected to see pictures of me making fancy cabinetry or carving life size bears from big logs! Nope not going to happen. What is going to happen and did in fact happen, is that Paul of the weary back is going to reduce this large pile of logs to a managable and tidy pile of split wood with a simple swing of a heavy axe. Well several hundred swings, plus this isn't all the wood pile either. The more I split the more wood kept coming my way, either from generous neighbours who wanted fallen trees off their land,(if I wanted to move them) or from my own back yard where trees were in the way of building my future workshop!

The above pile became this rather tidy woodcrib,(see below) made by yours truly with pallets scavenged from behind the local hardware store. Each half of that crib holds about 1 cord of firewood for next winter, the stuff on the left will be used 1st as it is the oldest and most seasoned wood. The stuff on the right might be good for winter 2009 or I might let it sit 'til 2010 to be sure it is well dried out. In case you are wondering why there is no roof on my woodshed, my extremely clever wife advised me to fill the crib with wood first and then add a roof so I don't ruin my back bending and twisting to load the wood to the top. Now thats what I call thinking, thanks honey.Oh a CORD of wood is 4 feet high x 4 feet deep x 8 feet long, and thats a lot more wood than it sounds like.

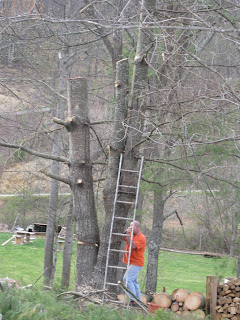
As I mentioned before some of our firewood will come from our own trees. Unfortunately I have to cut down a really nice Maple tree that is in my way. (See below) They say that timing is everything and I unknowingly decided to chop into this tree at just the right time. Apparently the first warm day after lots of cold nights is a good time to tap a Maple tree and collect the sap to make ...wait for it........MAPLE SYRUP. So I was cutting off a largish lower limb of this tree and all of a sudden it started spewing sap all over me so I quick ran into the house and found a 5 gallon bucket to hang under the Niagara like flow. While the sap was filling the bucket I looked on the internet to find out how to collect and refine maple sap. I learned that true professionals do not chop off a tree limb and let the tree bleed to death in a bucket, they actually have a little tapping tool that you push into a hole that you drill into the tree. I did know some of this stuff in a general sort of way from reading books and seeing documentaries. Our local hardware store that has been around for 100yrs and looks like anything you could ever want is on its shelves somwhere did not have maple tree taps, but they did manage to give me advice on how to make some. I adapted their advice to my needs and available materials and made 4 quite servicable taps. A tree the size of ours should only have one tap in it or else there is a good chance you will kill the tree. My tree was coming down anyway so I went a
little bit beyond 1 tap. I had made 4 taps and so I added all four to the cut off limb that was already there. 5 taps in all. Again not being a professional tree-tapper I only managed to collect 4 gallons of sap, a lot more I think dripped down the tree trunk and fed the ants and other sugar loving insects in the neighbourhood.

Maple syrup is made by boiling down the sap until it is about 1/40th of the original volume (no wonder pure maple syrup is sooo expensive). 1 Gallon is128 fluid ounces, divide that by 40 and you get 3 ounces of syrup. Let me say that again 1 GALLON gives you 3 OUNCES of syrup, its more expensive than gasoline!
I boiled down my first gallon on the stove in a saucepan, it only took 2 hours, and the resulting syrup tasted awesome.I have never tasted such a strong maple flavour in my life. According to Cheri's friend Beth, who has made maple syrup before, it was a good batch.(If you can call 2-3 oz a batch) She did say however that she thought I had reduced it a little bit too far and sure enough she was right because 2 days later it started to crystalise. It still tasted good but it was a wee bit crunchy!!!!
That is why I experimented with only 1 gallon 1st. (Thats MY story anyway) So my next 3 gallons will be done in a bigger pot on a hotter fire and hopefully it won't take me all day to make 10 oz of liquid gold. Also I will stop reducing just a little sooner so that the syrup stays as syrup
As a side note, my neighbour Mike has 7 Maple trees in a row and they are starting to crowd each other, soooo he and I will be dropping 3 of them(I get a bunch more firewood for helping him) and next March or April he says I can tap his trees to my hearts content, plus Cheri and I still have 3 very large Maple trees

 More tree work. Above, cut a wedge. Left cut the back of the wedge. Watch and listen carefully, prepare to run.


